
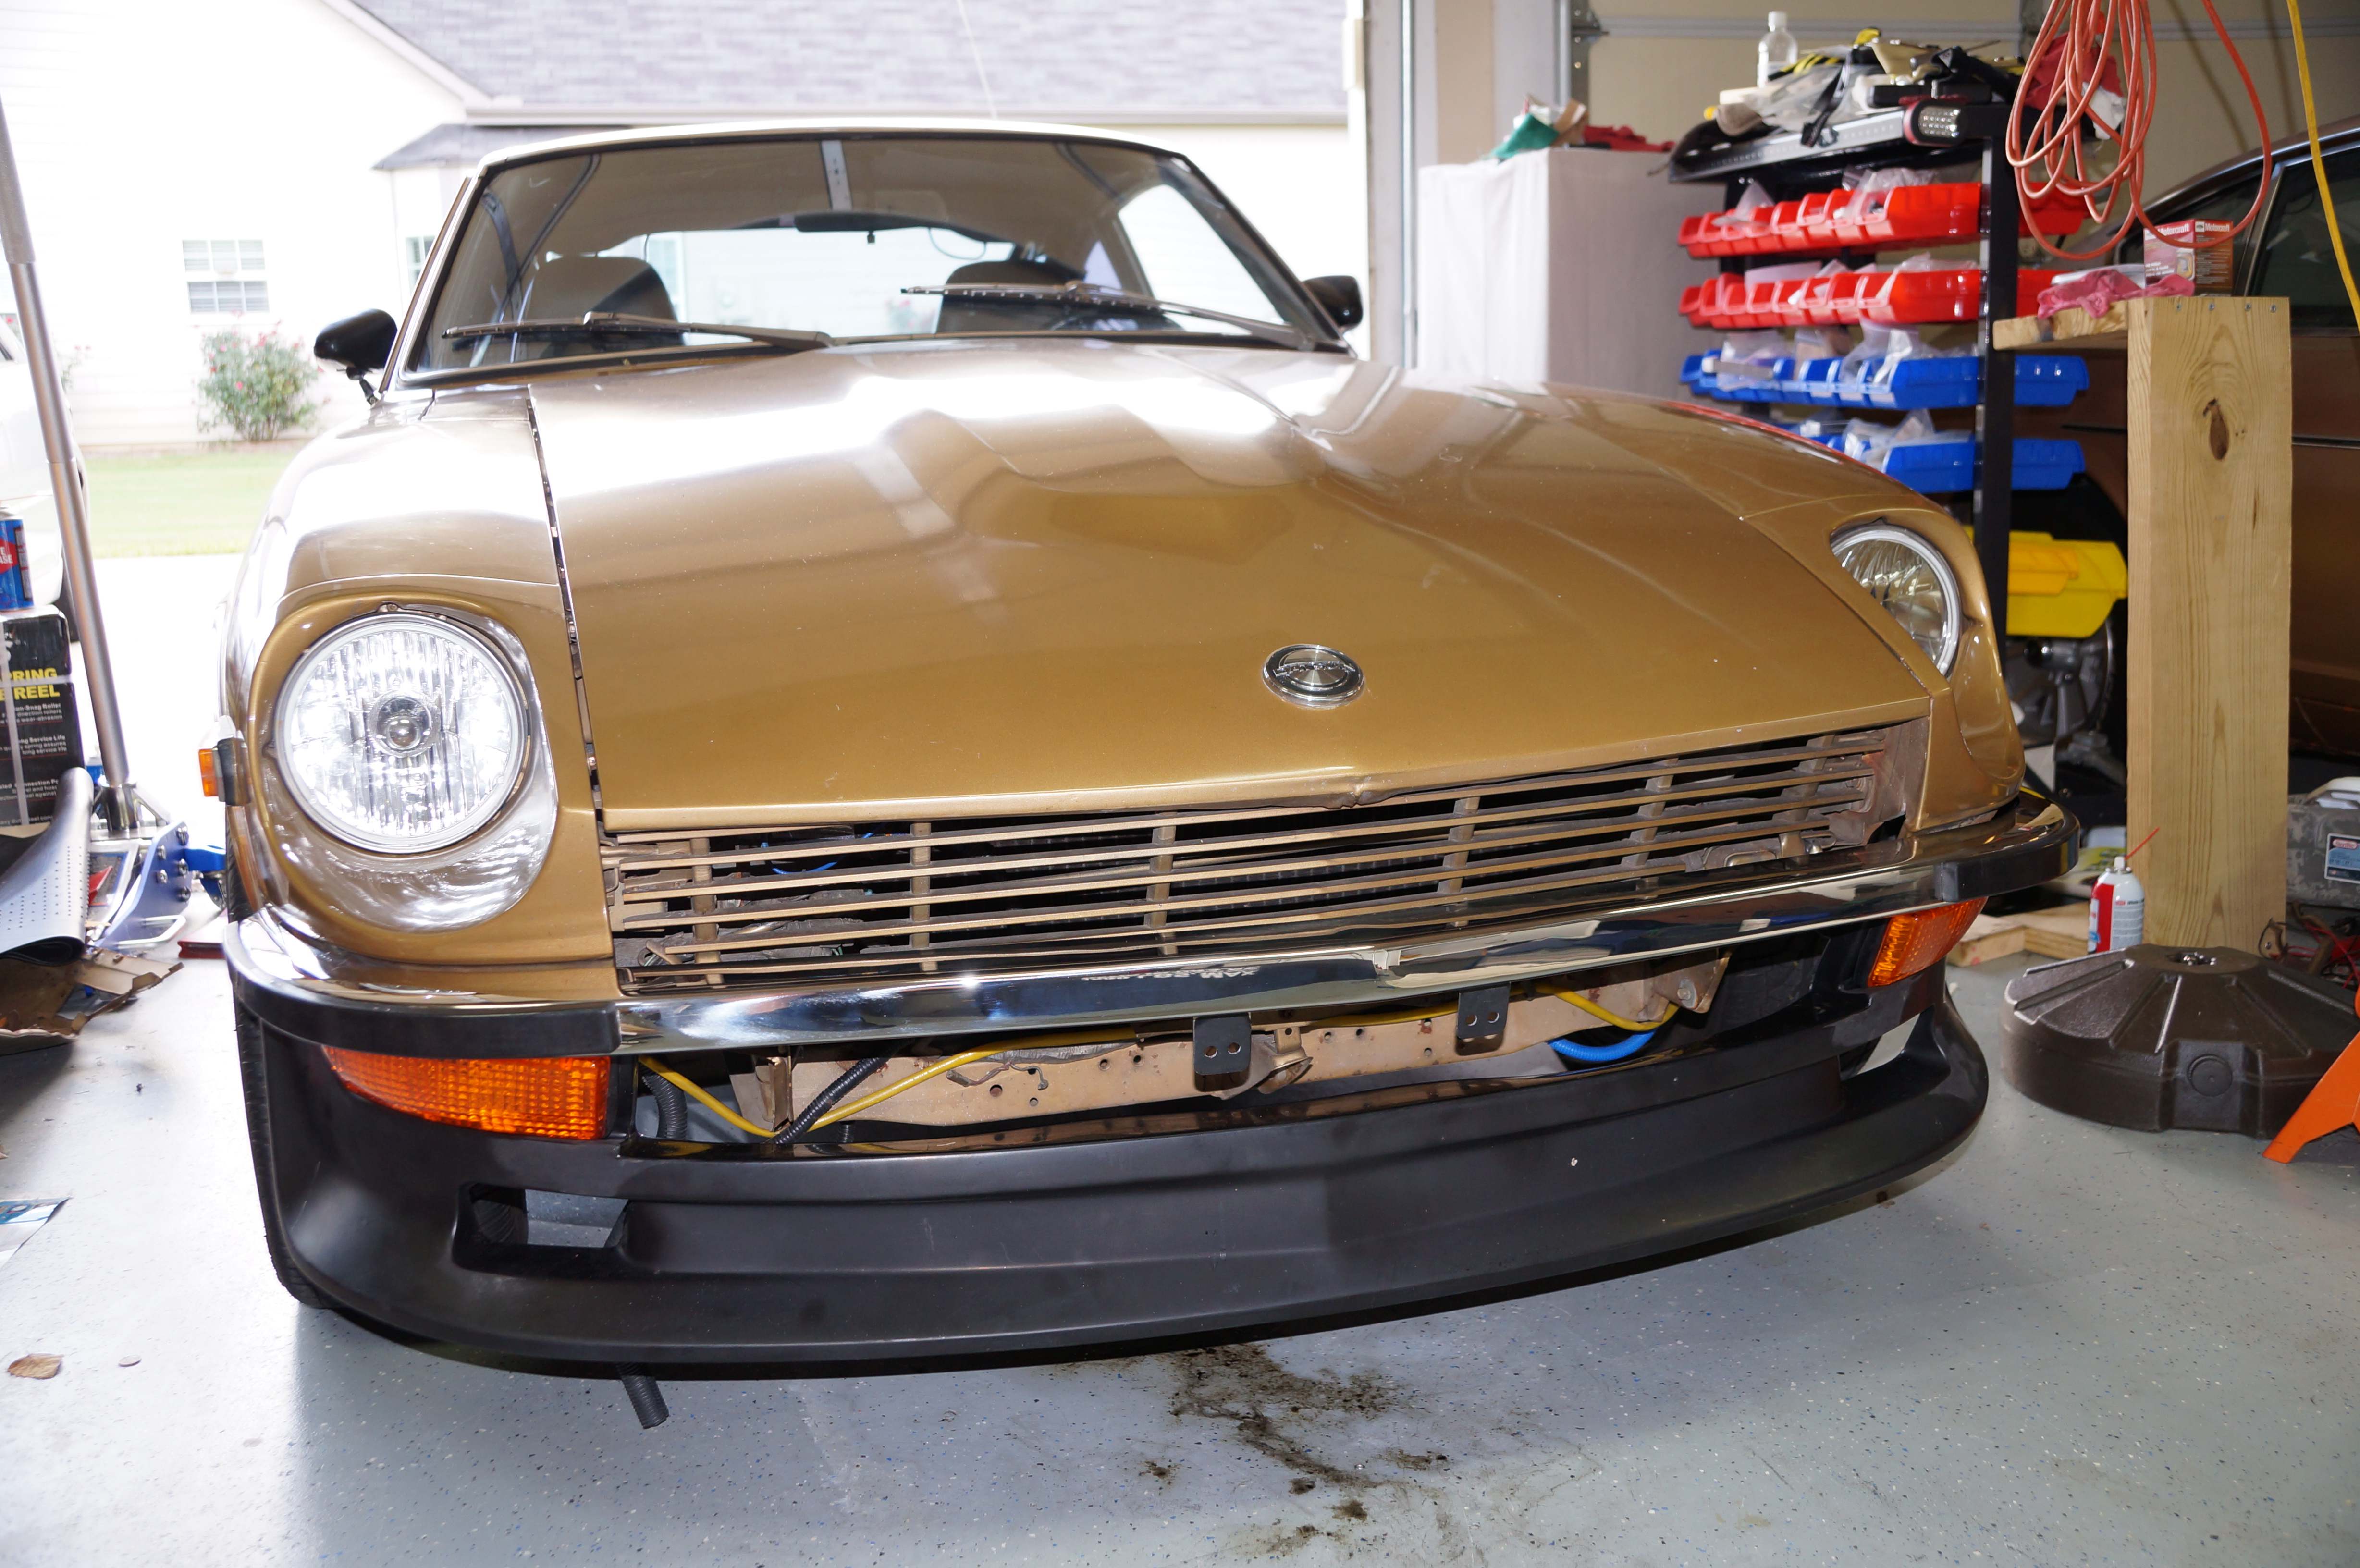
One of the issues with my 260Z is a lower front valence that had seen its fair share of abuse (and then some) over the last 40 years. Finally I had enough and ordered a Xenon air dam from Jegs. It sat in the dining room for a couple of months before I had time off from work and could tend to mounting it.
Step 1: Removing the valence
I put the car on jack stands and removed the front tires. That gave me better access to removing the bolts holding on the valence. The bolts on the right side came off with ease. I noticed that I needed to remove the front turn signals. Even more frustrating was the fact that I needed to remove the side supports from the front bumper. Eventually all of the passenger side fasteners were removed. Then the fun started…
The driver side fasteners were not nearly as forgiving as the passenger side nuts & bolts. I snapped off one bolt. I wasn’t concerned because I knew I wasn’t going to re-use the bolt. Then I tried to remove the left turn signal. I put the wrench on the first bolt, twisted it, and felt the bolt snap like a dried twig. The other bolt responded the same way but only after I heard the lens on the turn signal cracking with a piece falling to the floor. Finally there was one more bolt to removed. On the back side, there was a capture nut that was held in place by the valence sheet metal. The sheet metal slowly deformed, allowing the capture nut to spin like a top. I finally managed to pry away the sheet metal and used a multi-tool to cut through the bolt a little. After placing vice grips firmly around the capture nut, I turned the bolt, snapping it off. The valence fell to the ground, conquered.
Step 2: Fixing the Turn Signals
I removed the six M3 screws that held lens to the body of the turn signals. Of course, 40 years of corrosion made this tricky. I aided my cause by cutting away the gaskets where needed. They were dry rotted, so they need to be replaced anyway. I soaked the housings in Purple Power & water for an hour or so, rinsed them off, and soaked them in a bleach solution for a day and a half. They came out pretty white. I ordered new lenses and gaskets from Blackdragon Auto and got new M3 screws (16mm & 20mm lengths) from Ace Hardware. Now I had to figure out how to fabricate new bolts for the turn signals.


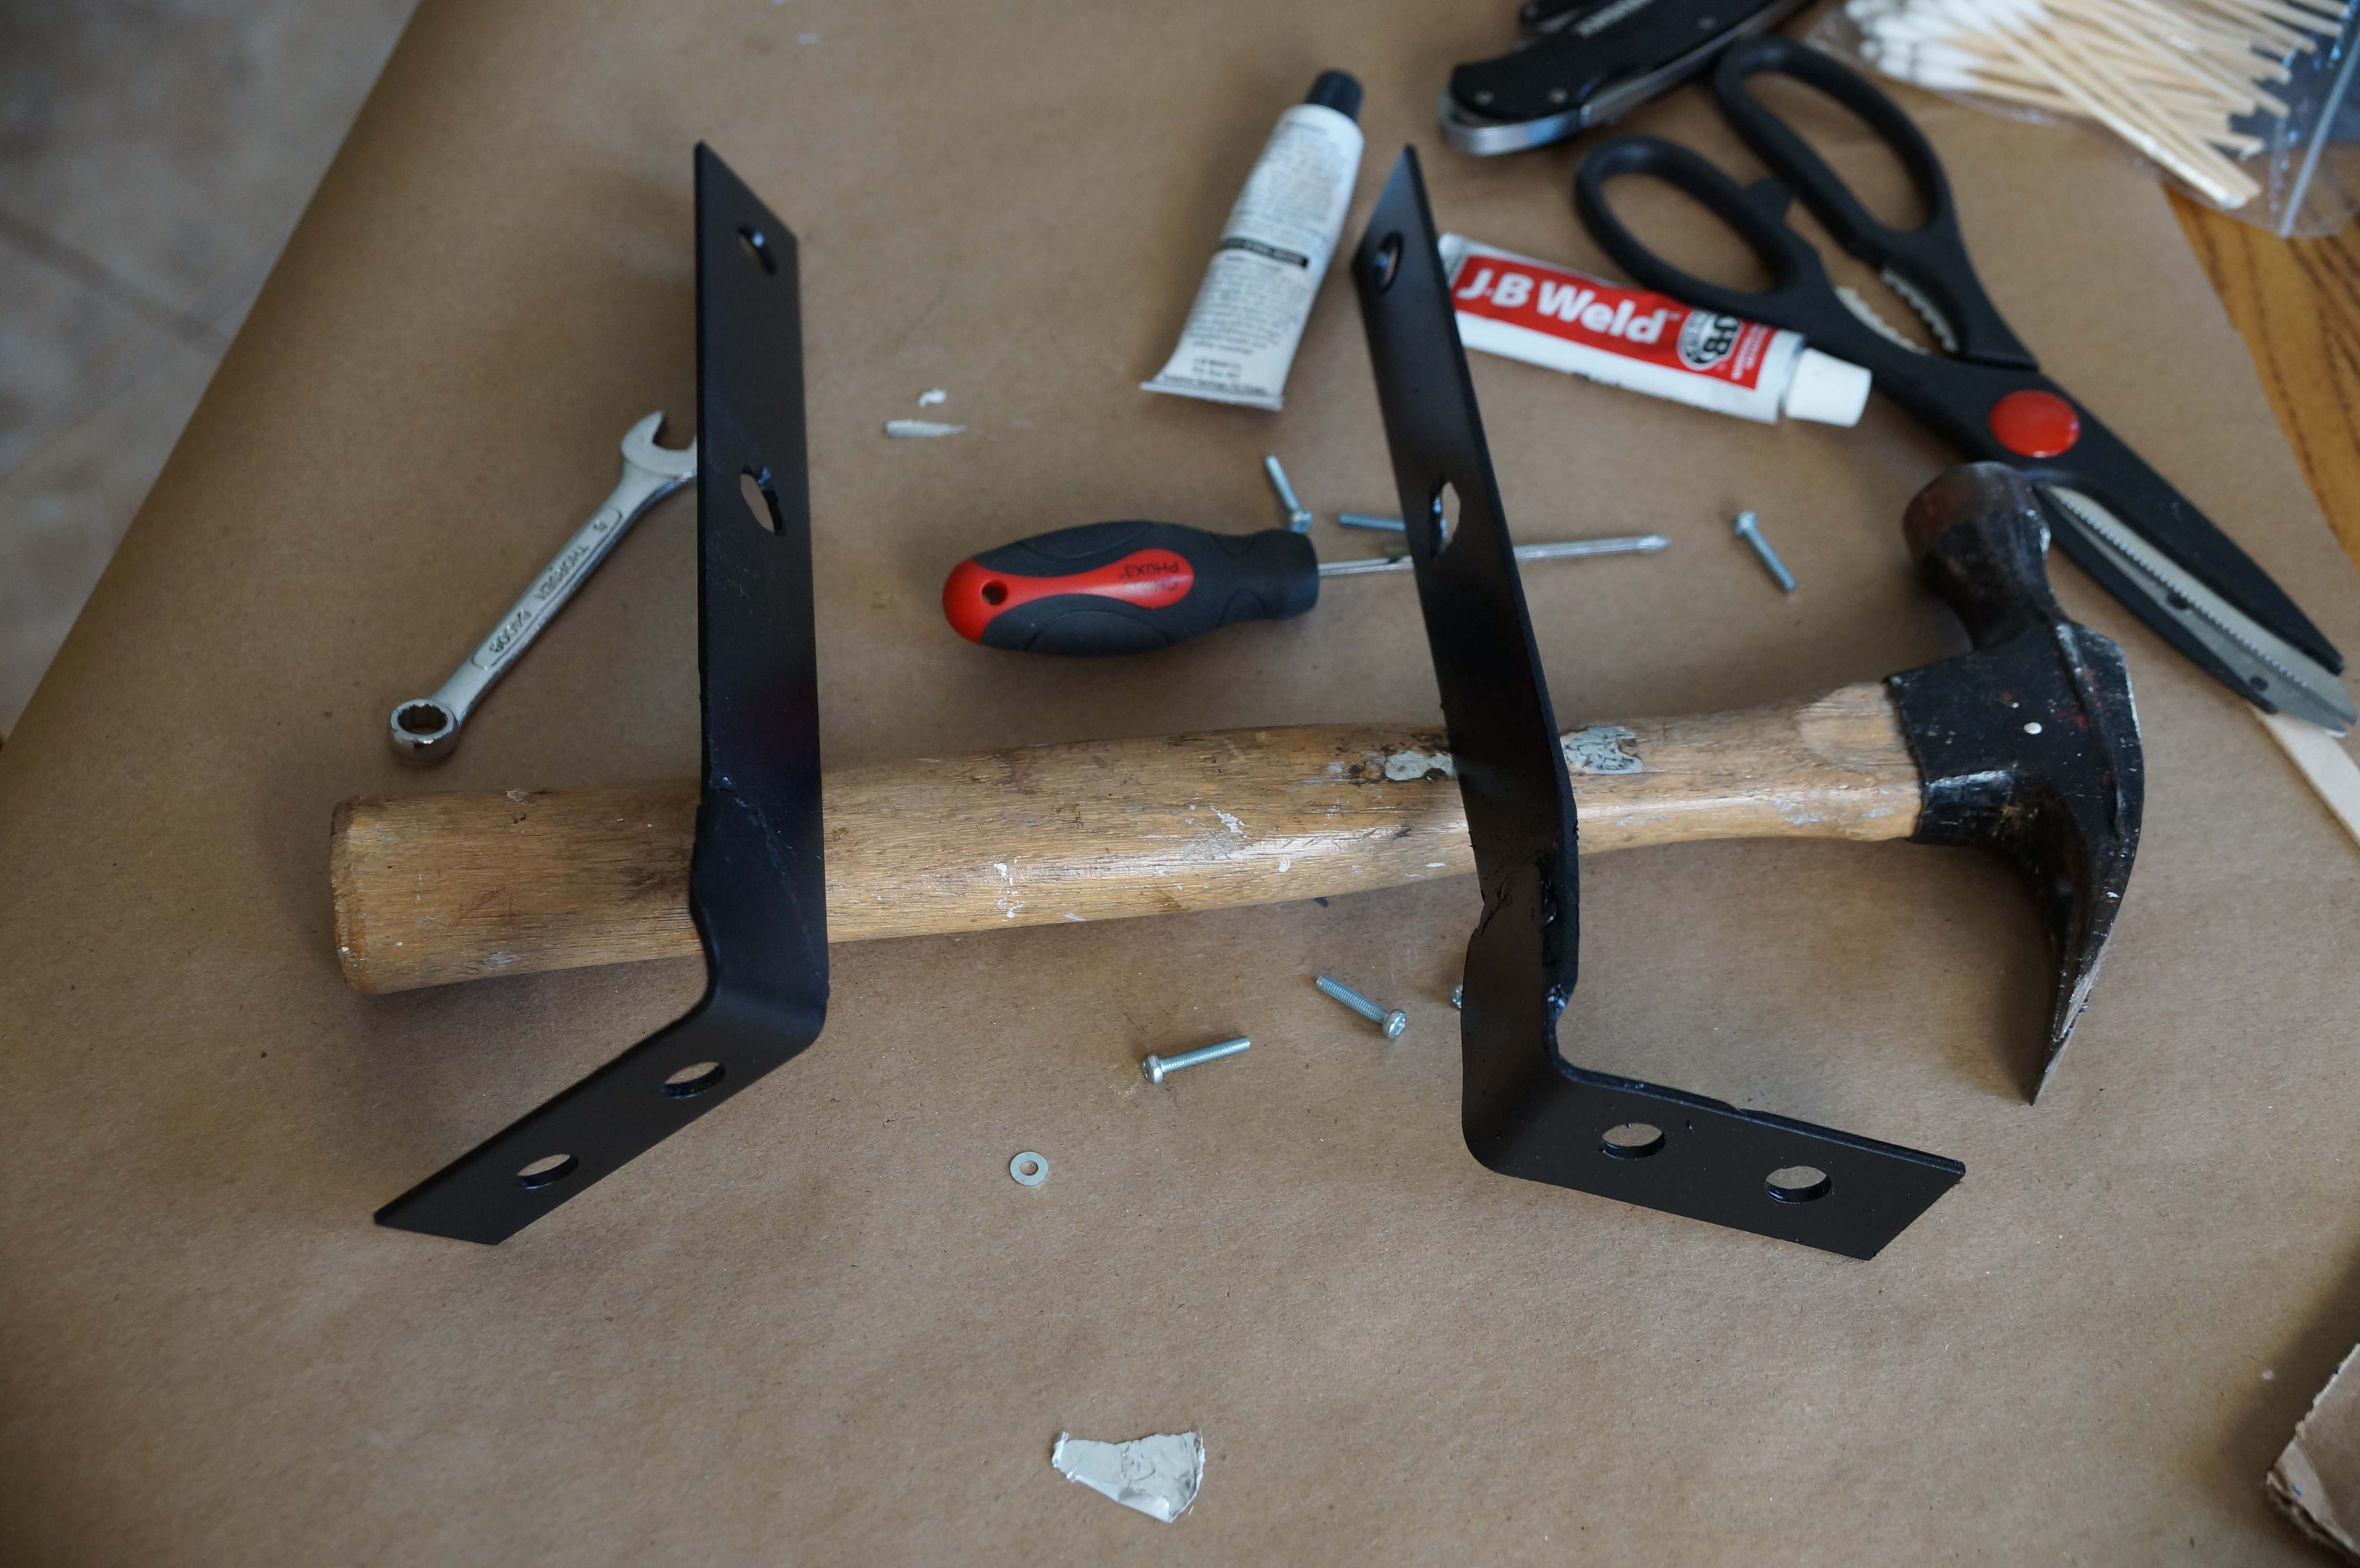
Those are the bolts that didn’t snap. I cleaned them up with some rust remover, but I didn’t want to re-use them because I hadn’t treated them. So I started with some M5 bolts. I ground the heads down to a fraction of their original size. I took a thin sheet of aluminum and cut some squares. I drilled 5 mm holes into the aluminum near the edge and put the bolts through the holes. I used JB Weld to bond the bolts to the aluminum and allowed it to set for a day. Meanwhile, I took some reflective tape and lined the housing some more to increase the light output.
I secured the new bolts to the turn signal housings and bent the aluminum over the edge to hold the bolt in place. I trimmed the excess aluminum and reassembled the turn signals.
Step 3: Mounting the Air Dam
The Xenon air dam does not come with any pre-drilled holes. That adds a challenge for alignment. I drilled holes and mounted the turn signals first. I realized that they were too high, so I drilled lower holes and remounted the turn signals. To align the air dam on the body, I finally figured out that I needed to clamp the sides at the wheel wells and support the middle. I noticed that I also needed to trim a little material from the air dam near the inside edges of the sugar scoops. I re-aligned the air dam and marked the front for holes. I removed the air dam and drilled the four holes. I mounted the air dam at the four bolt holes I made and marked the sides for drilling. After getting everything drilled out, I started attaching the air dam at the car. As I was working on the right front bolts, I realized that the turn signal housings were in the way. I removed the turn signals and got the air dam secured to the body. I put the turn signals back in and called it a day. The easy work was over.

I took the car out to the Georgia Z Club meeting the next day. It felt a lot more secure at freeway speeds.
Step 4: Mounting the Early Bumper
The big challenge with mounting an early bumper is that you either have to buy or fabricate special brackets. Being a glutton for punishment, I chose the latter course. I purchased a couple of pieces of flat steel. Then I attached the bumper to the car only with the side bolts. I then supported the bumper in the middle to give me an idea on alignment for the brackets. I used two of the three body mounting holes to make the template holes the brackets. I drilled out the holes and cut them a little short of the bumper. I had to elongate a couple of the holes to align better with the body mounting points. I then drilled out holes to align with the bolts on the bumper. I put the flat steel on the body and bumper to see where I needed to bend the steel. I bent the pieces that attached to the bumpers and put them back on the car. I aligned the bumper and clamped the steel pieces together. I welded the brackets, ground down the excess steels and welding slag, and handed the brackets over to my wife for painting.


After the paint had dried, it was merely a matter of putting the brackets on and tightening all of the bolts.


Next up will be mounting the early rear bumper. As my wife said, that should be easier.

Pingback: 260Z Air Dam and Front Bumper | Fiddling With Z Cars
Pingback: My Z needs to go on a diet :-)